We tried three or four online guides and at various points along the way, hit an obscure error message that didn't really mean an awful lot - so debugging and troubleshooting was difficult. Whenever we hit a problem, the best we could hope to do was reboot the Pi and start again, using someone else's guide!
But eventually, after following the Adafruit guide (almost) to the letter, but ignoring the "use rtl871xdrv" setting in hostapd.conf, we managed to create a wifi access point that various devices (Windows laptop, Android phone, Linux desktop etc) would connect to
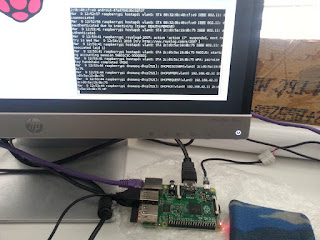
Here's our raspberry pi responding to incoming connections to the wifi access point
At first things looked quite promising - the Pi showed up as a wifi access point, using the SSID we set, and would accept (and reject) connections based on the WPA/passphrase. Once we got to the "connect and test" stage, things didn't quite pan out.
On our Windows 10 machine, after "connecting" the IP address was way out of the range we'd set on the Pi. Trying to ping the Pi on it's fixed IP address resulted in a "General Failure" error message. The Android phone started the connection process, which appeared in the log on the Raspberry Pi, but was never given an IP address. After a short delay, the phone would give up and prompt us to forget the connection.
Although the Adafruit website suggested that the problem was probably with the dhcp server configuration, it took some hunting around until we found this guide at http://www.pi-point.co.uk/documentation/
The final step is to configure dnsmasq so you can obtain an IP address from your new Pi-Point. Edit your /etc/dnsmasq.conf file to look like this:
# Never forward plain names (without a dot or domain part)
domain-needed
# Only listen for DHCP on wlan0
interface=wlan0
# create a domain if you want, comment it out otherwise
#domain=Pi-Point.co.uk
# Create a dhcp range on your /24 wlan0 network with 12 hour lease time
dhcp-range=192.168.1.5,192.168.1.254,255.255.255.0,12h
# Send an empty WPAD option. This may be REQUIRED to get windows 7 to behave.
#dhcp-option=252,"\n"
Remember to change the dhcp-range option for the network IP range you're using. If you're having problems with Windows7 machines then try uncommenting the last line. Restart dnsmasq by typing service dnsmasq restart for the configuration to take effect. Now you should be able to connect to your new Pi-Point and get a proper IP address from it.
Although we're not running the pi-point software, we had a working wifi access point, so we just picked things up from there. We changed the ip range to match the one we used while following the Adafruit guide and - amazingly - the access point started working!
The connection process takes just seconds, each device is correctly given it's own IP address from the DHCP server running on the Raspberry Pi. Since we set up the Pi with a static IP address of 192.168.42.1, even the ping request from our Windows laptop worked!
So now we've got our AP working on a Pi, we're going to have to learn how to respond to incoming connection requests from apps running on our devices, and how to process them to make meaningful stuff happen. It's only a small step so far, but quite a significant one!


No comments:
Post a Comment