
The miniatures actually looked pretty good (in the right lighting condtions) just as they were, albeit a bit shiny (ok, really, really shiny).

The dark tone provides really nice, deep contrasting shading, while the high points on the miniature are nice and bright. But the gloss finish is really unappealing (it doesn't show up too well in the photo, but it's really not nice at all!).
To tone down the gloss effect, we use Testor's Dullcote. It's a matt varnish, specially formulated to provide an ultra-matt surface. Some people even call it Deadcote - it does such a good job of "matting down" anything even vaguely shiny. (in comparison, the Army Painter Anti-shine - when you can get it to work - needs about two or three coats to completely remove the gloss shine created by the Quickshade). Dullcote takes just a couple of hours to dry fully, and provides a nice, matt surface which takes acrylic paints really well.
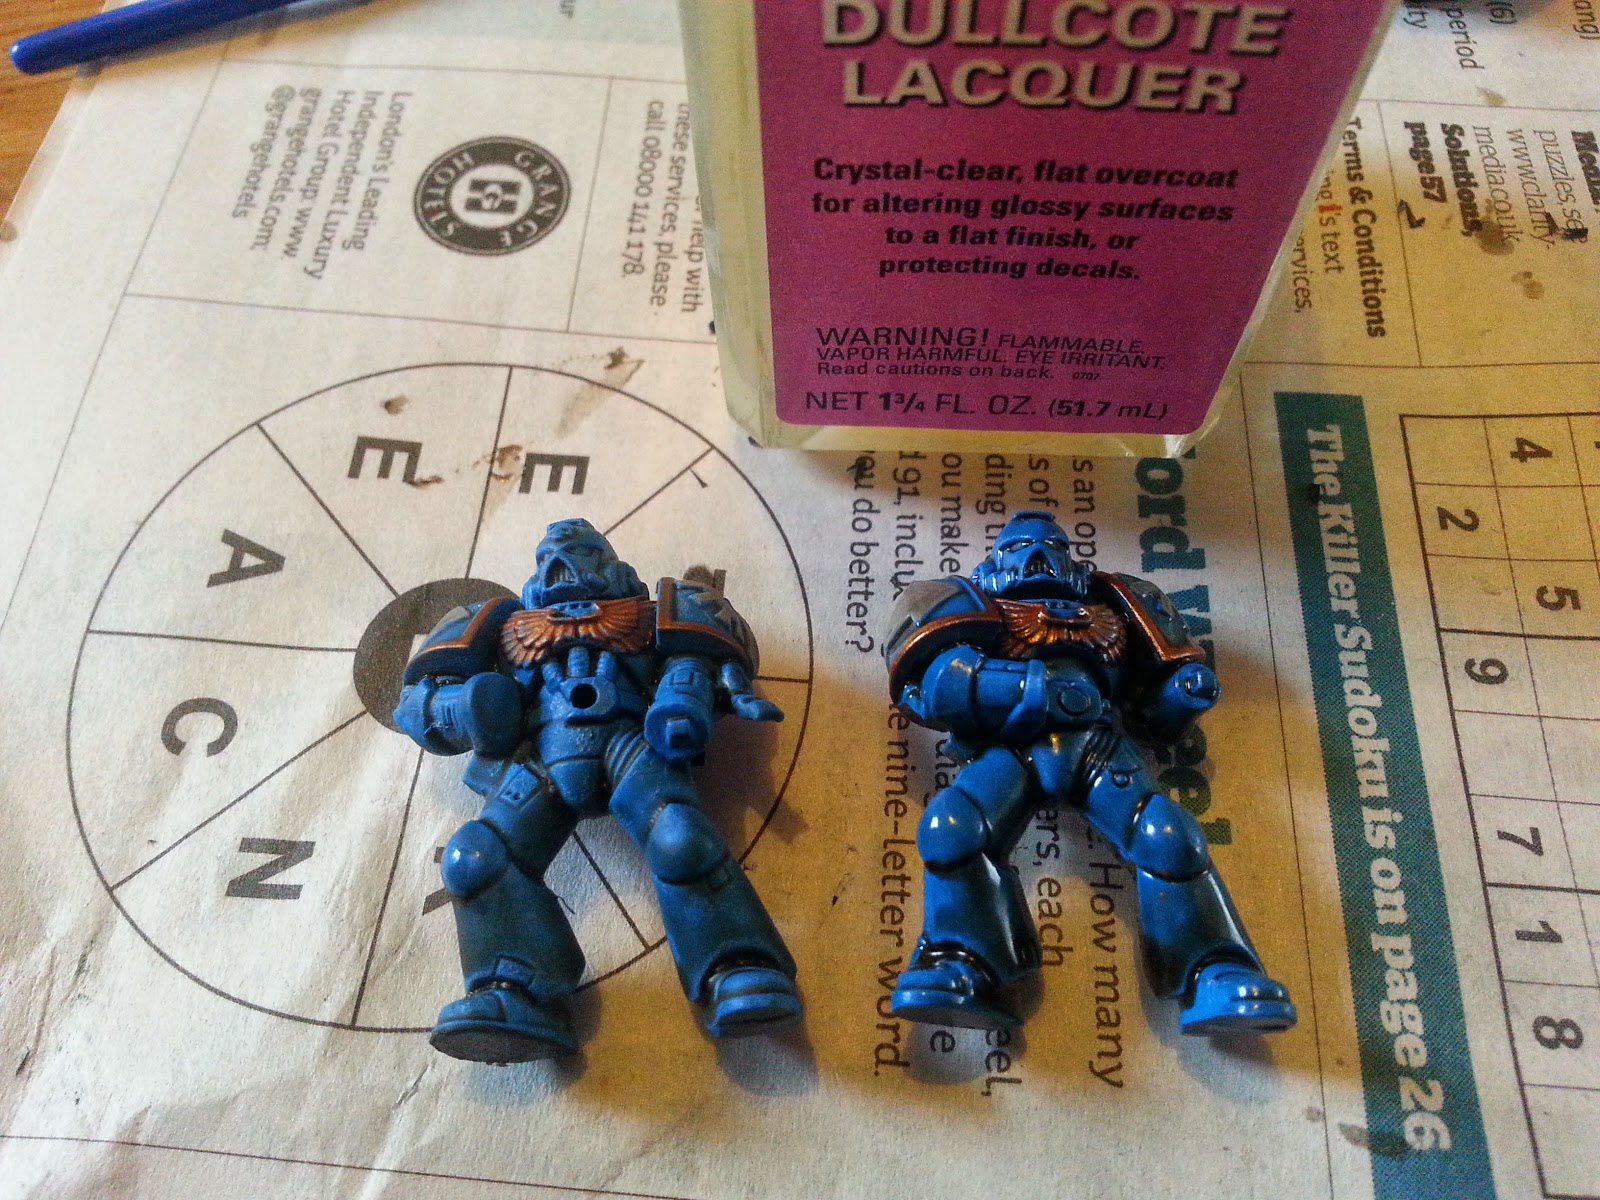
The character on the left has been painted with Dullcote, the character on the right is still waiting to be dulled down.
An interesting effect of applying dullcote is that it not only removes the shine from a model, but also does something to the contrast of the colours. The darkest recesses no longer appear really dark, and the raised parts no longer "stand out" because of their shiny appearance. It seems to not only dull the shine, but also the brilliance of the colours.

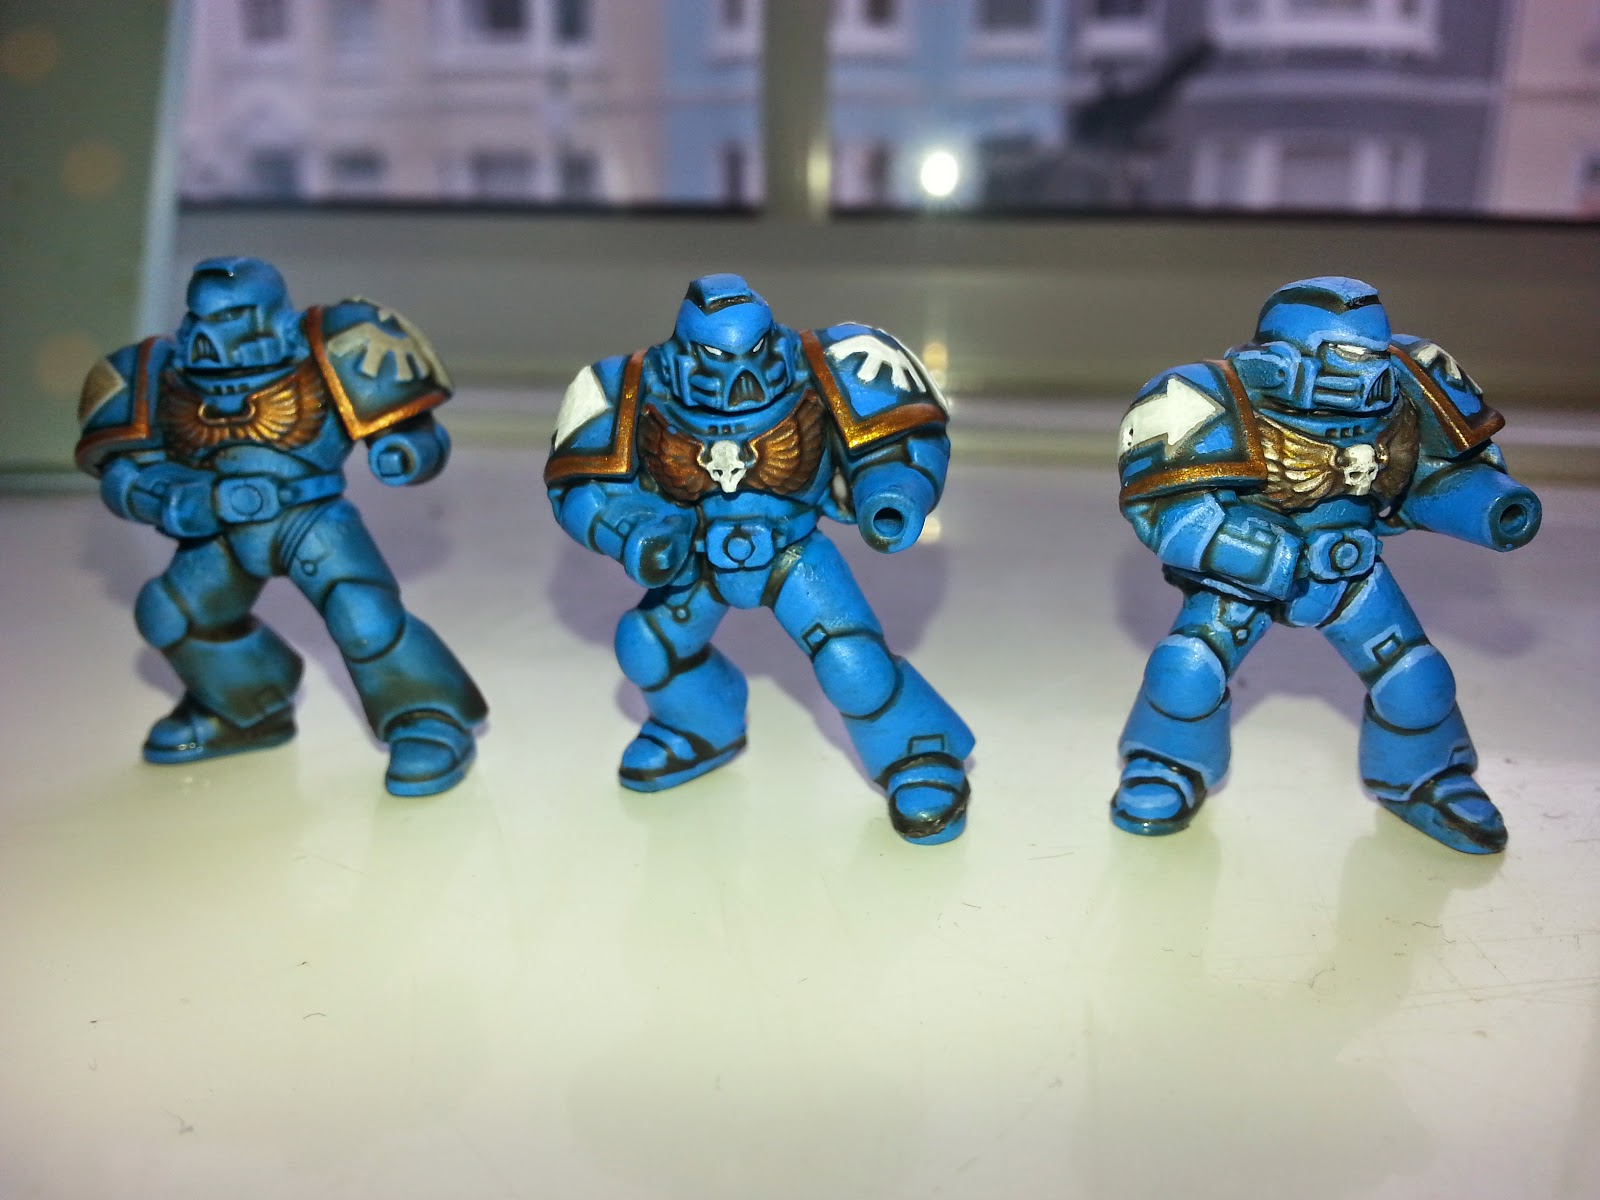
In the top half of the character on the left, you can see where the original Crystal Blue colour has been painted back in - particularly noticeable around the helmet and shoulder pads. Care was taken to allow a little of the "dulled" colours to show through (there'd be no point in completely painting over the lot of it!) and the result is a much "cleaner" looking model (compared to the model on the right).
Something that becomes noticeable after applying the Dullcote is how around many of the recesses, the paint actually appears brighter around the edges. Take a look at the markings on the bottom of the legs near the feet: the recessed part appears to be outlined in black - an affect we'd like to keep - but immediately alongside, the darkened-down blue appears much brighter than the surface around it.
This is an affect we wanted to simulate, by applying a much brighter blue colour as "edge highlights". The transistion from dulled, to cleaned, to highlighted model is shown below.
(although up close, you can see some of the brushmarks where the highlight colours have been applied, at a distance of a couple of feet - the distance you'd expect them to be when on a board game playing area - the finished miniatures look great!)
The miniature on the left is fresh from being Dullcoted. The model in the middle has had large areas of colour repainted (the white on the shoulders, a brighter gold applied on the rimes, and the original Crystal Blue repainted over the larger exposed areas). The model on the right has been "edge highlighted" to pick out the edges and transitional parts: it's particularly noticeable on the elbow pads and around the helmet and feet.
At this point, we're going to call our miniatures done (the guns and backpacks obviously need applying, but we're done as far as painting goes). We could probably spend a number of hours on each one, picking out the tiny, minute details on the models, applying multiple layers of shading and highlighting and so on. But the whole point of this exercise was "speed painting" - to get some models painted up to a "good enough" standard to pu them onto the tabletop.
And we reckon the guy on the right is painted to a "good enough" standard for what we need.
Total time taken so far: 4.5hrs
No comments:
Post a Comment